On to the hull. I added the transmission housing, and there’s a big, nasty gap. That needs putty, bottom, sides, and top.

fig. 4-1
Now, the aft starboard engine deck on a Panzer I B has a large, and easy to see through grill. You can’t win any contests with empty internals, so you either have to blank it off, add an aftermarket interior or scratch build one. I really hate to blank things off, though. I have a bad case of AMS and while I’m not a hard core rivet counter, I have been known to count them.
The problem was, try as I might, I could not find any aftermarket engines (not that I would buy one) nor even an image of what it looked like. There are plenty of images of the engine area of the Panzer I A, but the Ausf. B was a complete redesign of the engine.
Ultimately, I got my hands on copies of Panzer Tracts, nos. 1-1 and 1-2, which dealt with the Panzer I and its variants, and 1-1 has a couple pictures of the internals of the Panzer I B engine area. While I hate copyright, I also hate cease and desist letters, so I won’t link any pictures from it.
When you’re scratching things that can only be seen from certain angles, and then only partially, you don’t have to be super accurate or even complete. I only needed to do the vents, part of a fuel tank, and part of an air filter. I also added in part of an exhaust pipe, but it’s not visible once everything is closed up.

fig. 4-2

fit. 4-3

fig. 4-4
I didn’t know what the colors should be. I’ve seen directions in various models say that vents should be steel (in tigers and panthers, for example) or grey or primer color. I chose primer color. The air filters were white.

fig. 4-5
And then with the exhaust pipe (and insulation) painted. But it will never be seen (except now). At some point between these two images, I broke off the external exhaust pipe while trying hollow it out, and then lost it. And then forgot about it until just now.

fig. 4-6
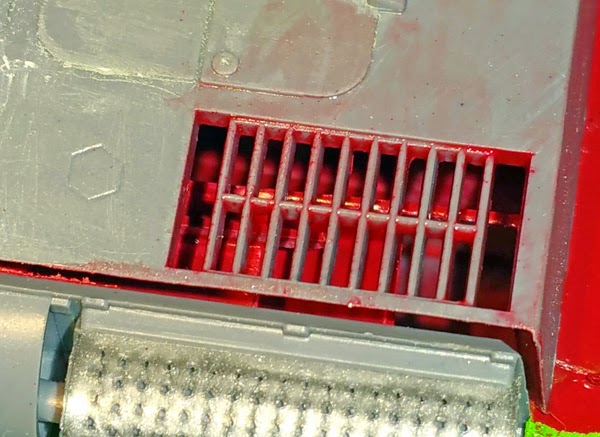
fig. 4-7
You can see that big ol’ gap between the top and rear hulls. That wasn’t just because I loosely fit the pieces. Eventually I had to clamp and putty it shut.
Then I masked off the areas of the sponsons that would be outside the superstructure, and painted the forward interior areas in a cream color. Unfortunately, the can of paint I had was gummy, and spit out small globs of paint, so the texture was rough, like sandpaper. However, since the crew area is only barely visible (there’s a crack under the superstructure on the sponsons and through the vents in the cupola), it’s not an issue.

fig. 4-8
At this point, the only thing left to do is join the hulls, put on the fiddly bits, and paint.
Part 1, review
Part 2, road wheels
Part 3, superstructure
Part 4, hull
Part 5, finishing up
